Uploading League Files
The first step an online league commissioner will need to do after creating a league will be to upload a copy of the files to the server so that the human managers can download the file. This process will repeat regularly throughout the life of the league.
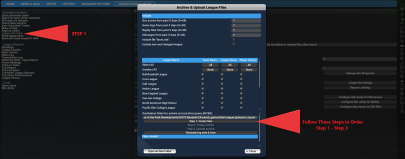
Commissioners can upload league files by clicking on the League File Center.

Creating a league file for your managers is simply bundling many files into a single archive file, and then uploading it to the FTP server. This screen includes a number of different options that allow the commissioner to customize the set of files that will be included. The options selected here are important because they have a huge impact on the size of the league file that will be generated, and they also impact the experience of the other human managers.
In the top part of the page, the commissioner makes decisions about certain files to include:
- Box scores from past X days - Tells the game how many days' worth of box scores to include in the league file. Set this to 0 to include all game logs in your league.
- Game logs from past X days - Tells the game how many days' worth of game logs to include in the league file. Set this to 0 to include all game logs in your league.
- Replay Files from past X days - This allows your GM's to watch any replays of the simulated games.
- Messages from past X days - Tells the game how many days' worth of news messages to include in the league file. Set this to 0 to include all messages in your league. You should set these to at least the length of your usual sims, and may want to include more than that to ensure that GMs who fail to download an update aren't missing any files. If any of these files are missing from a GM's computer, they will see "blank" news and messages in their game.
- Include file "Faces.dat" - This will give your GM's an updated facegen file of the players in your league with new uniforms and hats on them if they moved leagues.
- Include new and changed images - Any new logos or uniforms changes in game.
The next section of the screen defines whether you will include news and history data:
Team & League News, Player History
In this section, each league in your game will be listed along with a series of three checkboxes across the screen, representing the following:
- Team News - news articles specific to individual teams
- League News - news articles specific to the overall league
- Player History - the history reports for players in the league
Use the checkboxes to determine whether you wish to include these items in the league file. You can also use the 'All' buttons to select all of the leagues in that column, or the 'None' button to deselect all of the leagues in that column.
Note: If you are going to be posting online reports to your web server, you may not need to include these files, as your general managers can just as easily read the news on your web site.
The bottom part of this screen allows you to select the destination for your file and create the files:
Destination folder for archive on local drive (Press Enter)
The top line in this section contains the full path where the archived league file will be stored. You CAN edit this file location by clicking on this line and typing in your new location and then you MUST hit enter when done. This defaults to the import_export directory within your saved game directory. (By default on PCs: C:/Documents and Settings/[user name]/My Documents/Out of the Park Developments/OOTP Baseball/data/saved_games/[My Game].lg/import_export). This is important to know this location for Commissioners that do not use 3rd party software because this is the file you will want to send to your league members.
There should be no need to change this value unless you have a specific need to do so. If you do alter this path, be sure to press Enter once you are finished editing.
There are three remaining steps:
1. Click on the Create Files button. This will generate a text file in the destination directory called league_files.txt that lists all of the required files based on the settings you defined on the page. The bottom of the screen keeps a tally of the number of files in the list.
2. Click on the Create Archive button. This creates a tar.gz compressed archive file in the destination directory, named according to the league name you defined in the online league options described in Setting up an Online League (Commissioner).
3. Click on the Upload Archive button. This will upload the tar.gz file to the team exports directory defined in the online league options described in Setting up an Online League (Commissioner).
All of these steps are optional, and designed only to make a commissioner's job easier. Commissioners may choose to zip files with an alternate archiving tool, or use an external FTP client to transfer the files.
Note: Human managers in your league do not need to have any special software capable of handling tar.gz files. This is handled by the game. However, if you choose to use an archiving tool, you will need to ensure your managers all have the software required to open the archive.
